Controlling a 2D Robotic Arm with Deep Reinforcement Learning
Learn how to control a robotic arm using deep reinforcement learning techniques.
Let’s face it — we all need an extra hand sometimes.
But wouldn’t it be great if that extra hand were also attached to a massive robotic arm that can lift heavy equipment, film me as I conduct highly dangerous scientific experiments, and occasionally save my life while also managing to be my best friend?
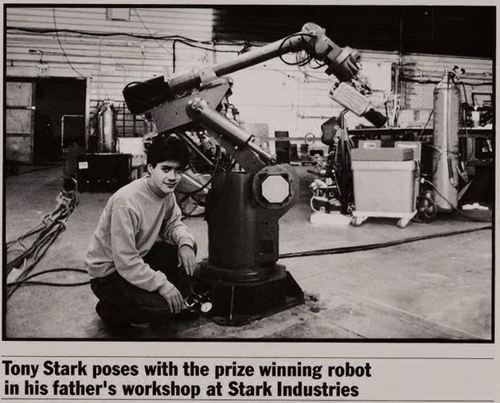
Oh, right. I’m talking about the robot arms from the MCU’s Iron Man movies. And pretending that I’m Tony Stark again.
In this post, we’ll take our first steps towards building our own robotic arm best friend by diving into deep reinforcement learning.
We’ll be programming the motion of a simulated 2D robotic arm in Python using a basic robotics environment – which we’ll create ourselves. By the end of this tutorial, you'll understand the basics of robotics and learn how to program robots to achieve their goals using Deep Reinforcement Learning. Everything you'll learn will generalize to 3D robots, humanoid robots, and physical robots that can move around in the real world – real worlds like planet Earth, the moon, or even Mars.
The primary advantage of using deep reinforcement learning is that the algorithm you’ll use to control the robot has no domain knowledge of robotics. You don’t need to be a differential equations expert to get your robot moving. Instead, you can rely on your knowledge of deep learning to become a wunderkind roboticist.
You can download the code we'll be using by Morvan Zhou and run python main.py to see the arm working.
What is a robotic arm?
At a high level, a humanoid robot is composed of a bunch of links (such as forearms and thighs) and joints (such as elbows and knees). A joint is connected to one or two links, and a force applied on your joints will bend your links correspondingly.
Instead of looking at a full humanoid robot, we'll be restricting our attention to a single arm, since the dexterity they require makes them interesting to study. The arm below has three joints (the shoulder, elbow, and wrist) and two links (the (humerus aka upper arm and the forearm).

Robot arms aren't just for superheroes – they're popular with a wide range of applications. You’ll find them on the surface of Mars, inside car manufacturing plants, and even on Amazon.com if you're looking for a cheap DIY weekend project.


Robotics environments
For this post, we’ll abstract away the complexities of building a robotic arm in the real world. Instead of actual hardware, we’ll be using a program that simulates a robotics environment.
Don’t worry — this is exactly what the pros do. Whether you’re working at OpenAI or Boston Dynamics, you begin all your robot experiments with simulated robotics environments. Let's face it – giant robots are really expensive to build, not to mention that a flailing robot arm can seriously injure you. It’s much safer and more time effective to start your robot experiments in software.
You can find a wide variety of open source and closed source robotic simulation environments. A popular one which you'll often see in papers is Mujoco – a full fledged 3D physics simulator. Unfortunately, Mujoco's non-commercial license is $500 per year, so we'll need to look elsewhere for our tutorial 😔.
Other options includes Gazebo or any game engine such as Unity or Unreal. Unity, in particular, has recently published Unity ML Agents, which makes it really easy to add intelligence to your Game Objects in a very Unity-like fashion. I personally really enjoy building robots in Unity and I'll cover how to do that in a future post (once we move on to 3D robots).
Finally, another great option, which keeps us free of big dependencies, is building our own simple physics simulator in a Python graphics engine, such as Pyglet. If your goal is publishing a Reinforcement Learning paper or building a multi-platform game with users, then I wouldn't recommend this option. However, for our purposes, building a simple physics engine is a viable first choice since it has the advantage of being incredibly transparent. There's no "magic" here – which will help us better understand how robotics engines are built, better preparing us for when we move to something more complex.
Learning in robotics environments
Inverse Kinematics
The typical approach to learning to solve goals in robotics environments is Inverse Kinematics. Here's my simple definition:
Given an end position for an effector (just a fancy word for finger), what are the forces we need to apply on joints to make the end effector reach it?

Seems reasonable. However, finding the necessary forces will require some pretty fancy algebra and trigonometry. This can get pretty brutal rather quickly, especially if we’re trying to figure out how things like:
How does the movement of a hip can influence the position of your finger?
If we also expect the robot to move around the environment as well, then we'll also need to layer in differential equations. My head already hurts.
Thankfully, there’s a much easier approach that has recently become popular.
Reinforcement Learning approach to IK
We assume that most of our audience is familiar with basic Machine Learning techniques, and we will instead propose a general method to solve goal oriented problems in robotics in a fairly general fashion.
In essence, all that's required is to specify the desired goal in code as a reward function and our infrastructure will take care of the rest.
We'll develop our example in Python – where we'd like the finger of a robot (the endpoint of the second link of our arm) to reach a certain goal.
It’s worth mentioning that we’re abstracting away the notion of a hand with multiple fingers into a single fingered arm. We could have also taken an alternate approach that modeled multiple fingers at the end of our arm, but this added complexity will slow down our learning process.
Notice how we don’t care to specify where the arms should be exactly, all we care for is having the finger be in the right place. So we'll translate this in a fairly straightforward manner into the below.
def reward(finger, goal):
    return -distance(finger, goal)
Our goal is to minimize the distance between the finger and the goal so we'll output rewards close to 0 when they are close to each other and negative rewards if they are far apart.
This simple framework has enabled researchers at Google to teach robot arms fine movements such as opening a door so let’s go over in more detail what reinforcement learning is and how it works.

Reinforcement Learning
Reinforcement learning is an area of Machine Learning which looks at agents trying to maximize their cumulative reward given the state they’re in by taking a sequence of actions.
The framework is general enough and has been applied to great success to achieve excellent performance on board games such as Chess to video games such as Dota.


A good image which summarizes how Reinforcement Learning algorithms work is the below where you have an agent interacting with the environment by performing an action and the environment in turn returns a reward and the new state the agent finds itself in.

To make things more concrete in the case of our 2D robot arm
- The environment consists of where the two arm joints are in space
- The reward is the negative of distance between the finger and the goal
- The actions consist of a real valued up or down movement on each of the two joints
Unfortunately, most reinforcement learning algorithms don’t work well out of the box with real valued actions. The convergence of reinforcement learning algorithms is proportional to the state space and action space and if the action space is infinitely large like in the real physical world that means we’ll be waiting a long time before our arm learns anything at all.
That’s why we’ll be using Deep Deterministic Policy Gradients (DDPG) to make this work.
Deep Deterministic Policy Gradients
Policy gradients are a family of reinforcement learning algorithms that attempt to find the optimal policy to reach a certain goal.
Deep Deterministic Policy gradients have a few key ideas that make it work really well for robotic control problems:
- Model free: the algorithm doesn’t need any internal details of how the robot works or need to compute differential equations. All it needs is low level observations like the positions of joints
- Deterministic: the algorithm will always run the same way on the same test examples which makes it easy to debug when things aren’t working well
It also employs a couple of tricks which have become a de facto standard for most real world applications of reinforcement learning. At an extremely high level they are:
- A replay buffer: to store past observations and rewards sample from when training occurs
- Target networks: a way to freeze the training objective to make learning more stable
- Batch normalization: to prevent the outputs of the layers our neural nets from diverging
If you’d like to learn more we’d highly recommend you go through the original paper
How to program a 2D robot arm
We'll mention again that in practice you'll use a more robust simulator such as the ones in Gazebo or roboschool.
However, I've found that learning how to implement the simpler cases such as a 2D robot arm gives us a lot insight into how to implement a 3D robot arm or even full humanoid robot and helps us appreciate the work that goes into them. What we’ll be programming is a 2D robot arm made up of two joints and two links. The goal will be for the endpoint of the second link to touch a goal which we’ll represent as a little red square.
At a high level what we need for the 2D robot environment or for that matter any environment on which we hope to run a reinforcement learning algorithm is the below. If you look at the core interface in Open AI gym, you'll notice that it looks very similar to the below.
class ArmEnvironment():
    def __init__(self):
        pass
    def step(self, action):
        pass
    def reset(self):
        pass
    def render(self):
        pass
Since we're not looking to create our own graphics library (although this is something you could do if you were interested), we'll be using Pyglet as a way to render our arms as rectangles and our goal as a square so let's create our Viewer class now which should take in an arm_info data structure and a goal and render the state on our monitor.
Let’s take a look at how our arm looks like again

To draw the above arm we’ll be using Pyglet, a graphics library for Python. The way Pyglet renders rectangles on screen is by specifying the x,y location of each of the four vertices of a rectangle along with the color. We’ll also render a goal as a little red square that we want the finger to touch.
class Viewer(pyglet.window.Window):
    thickness = 5
    def __init__(self, arm_info, goal):
        # vsync=False to not use the monitor FPS, we can speed up training this way
        super(Viewer, self).__init__(width=400, height=400, vsync=False)
        #make screen black so you can start rendering other stuff on it
        pyglet.gl.glClearColor(0, 0, 0, 0)
        #take our arm state
        self.arm_info = arm_info
        self.center_coord = np.array([200, 200])
        self.batch = pyglet.graphics.Batch()

        #Render goal
        self.goal = self.batch.add(
            # Goal is a square: specify its 4 corners with v2f
            4, pyglet.gl.GL_QUADS, None,
            ('v2f', [goal['x'] - goal['thickness'] / 2, goal['y'] - goal['thickness'] / 2,
                     goal['x'] - goal['thickness'] / 2, goal['y'] + goal['thickness'] / 2,
                     goal['x'] + goal['thickness'] / 2, goal['y'] + goal['thickness'] / 2,
                     goal['x'] + goal['thickness'] / 2, goal['y'] - goal['thickness'] / 2]),

            #specify its color with c3b
            ('c3B', (255, 0, 0) * 4))

        # Can generalize the below to multiple arms
        # Let's do 2 arms for now
Great now we can display an arm and a goal:

Let's think a bit more about how to represent the state of the arm environment and then how to move the arm around and how we'll make this environment work with our reinforcement learning code. The Arm environment needs to hold the following key information:
- A viewer class
- State dimension which consists of:
- Whether the goal was reached
- The position of the two joints on the screen
- The distance of the joints to the goal
- Action dimension which consists of the two joints we're operating on with a scalar value that would nudge each one up or down to make them more likely to reach the goal
- An arm info data structure which keeps track of the length of each arm and the radius the arm makes with a horizontal line going through the center of the screen.
class ArmEnvironment():
    #Pyglet specific viewer, we could use others like pygame
    viewer = None
    # refresh rate
    dt = .1
    #we specify a goal
    goal = {'x': 100., 'y': 100., 'thickness': 10}

    #state is comprised of 9 elements
    state_dim = 9
    #we have two joints which we'll put forces on
    action_dim = 2
    #actions correspond to a nudge up or down
    action_bound = [-1, 1]

    def __init__(self):
        #Will track arm length and arm radius info in the same data structure
        self.arm_info = np.zeros(
            2, dtype=[('l', np.float32), ('r', np.float32)])

        #arm lengths
        self.arm_info['l'] = 100
        #arm radiuses
        self.arm_info['r'] = 0
        #boolean variable that tracks whether finger is on the goal
        self.on_goal = 0
def step(self, action):
    done = False
    action = np.clip(action, *self.action_bound)

    self.arm_info['r'] += action * self.dt

    # normalize angles
    self.arm_info['r'] %= np.pi * 2
    # arm 1 and 2 lengths
    (a1l, a2l) = self.arm_info['l']

    # arm 1 and 2 radiuses
    # map to theta 1 and theta 2 on the image
    (a1r, a2r) = self.arm_info['r']
    a1xy = np.array([200., 200.])    # a1 start (x0, y0)

    # look at screenshot below to convince yourself that this works
    # a1xy is the origin joint at the base of arm 1
    # a1xy_ is the point between the two arms
    # finger is the point at the tip of arm 2
    a1xy_ = np.array([np.cos(a1r), np.sin(a1r)]) * a1l + a1xy
    finger = np.array([np.cos(a1r + a2r), np.sin(a1r + a2r)]) * a2l + a1xy_

    # We are choosing to represent the state of the arms as a function of the distance from the goal
    # there are other ways to do this that would work just fine including automatic ones using convnets
    # the 400 is there because we are normalizing distances by the window size
    dist1 = [(self.goal['x'] - a1xy_[0]) / 400, (self.goal['y'] - a1xy_[1]) / 400]
    dist2 = [(self.goal['x'] - finger[0]) / 400, (self.goal['y'] - finger[1]) / 400]

    # The reward function could be engineered further but for now we'll just say we want the finger to be close to the goal
    r = -np.sqrt(dist2[0]**2+dist2[1]**2)
    # if the finger touches the goal we want to give it a big bonus reward
    if self.goal['x'] - self.goal['thickness']/2 < finger[0] < self.goal['x'] + self.goal['thickness']/2:
        if self.goal['y'] - self.goal['thickness']/2 < finger[1] < self.goal['y'] + self.goal['thickness']/2:
            r += 1.
            # We are done when the finger stays on the goal for more than 50 iterations
            # This is to prevent the agent from learning a flailing policy
            self.on_goal += 1
            if self.on_goal > 50:
                done = True
    else:
        self.on_goal = 0

    # state is of size 9 because we have two joints each need 2 points to describe
    # we have one distance with two values to describe
    # and boolean for whether we are on goal or not
    s = np.concatenate((a1xy_/200, finger/200, dist1 + dist2, [1. if self.on_goal else 0.]))
    return s, r, done
Many of the remaining functions are formalities so we'd suggest you check out the repo directly to understand how they work so let's get to the meaty part which is the step function.
def step(self, action):
    done = False
    action = np.clip(action, *self.action_bound)
    self.arm_info['r'] += action * self.dt
    # normalize angles
    self.arm_info['r'] %= np.pi * 2
    # arm 1 and 2 lengths
    (a1l, a2l) = self.arm_info['l']
    # arm 1 and 2 radiuses
    # map to theta 1 and theta 2 on the image
    (a1r, a2r) = self.arm_info['r']
    a1xy = np.array([200., 200.])    # a1 start (x0, y0)
    # look at screenshot below to convince yourself that this works
    # a1xy is the origin joint at the base of arm 1
    # a1xy_ is the point between the two arms
    # finger is the point at the tip of arm 2
    a1xy_ = np.array([np.cos(a1r), np.sin(a1r)]) * a1l + a1xy
    finger = np.array([np.cos(a1r + a2r), np.sin(a1r + a2r)]) * a2l + a1xy_
    # We are choosing to represent the state of the arms as a function of the distance from the goal
    # there are other ways to do this that would work just fine including automatic ones using convnets
    # the 400 is there because we are normalizing distances by the window size
    dist1 = [(self.goal['x'] - a1xy_[0]) / 400, (self.goal['y'] - a1xy_[1]) / 400]
    dist2 = [(self.goal['x'] - finger[0]) / 400, (self.goal['y'] - finger[1]) / 400]
    # The reward function could be engineered further but for now we'll just say we want the finger to be close to the goal
    r = -np.sqrt(dist2[0]**2+dist2[1]**2)
    # if the finger touches the goal we want to give it a big bonus reward
    if self.goal['x'] - self.goal['thickness']/2 < finger[0] < self.goal['x'] + self.goal['thickness']/2:
        if self.goal['y'] - self.goal['thickness']/2 < finger[1] < self.goal['y'] + self.goal['thickness']/2:
            r += 1.
            # We are done when the finger stays on the goal for more than 50 iterations
            # This is to prevent the agent from learning a flailing policy
            self.on_goal += 1
            if self.on_goal > 50:
                done = True
    else:
        self.on_goal = 0
    # state is of size 9 because we have two joints each need 2 points to describe
    # we have one distance with two values to describe
    # and boolean for whether we are on goal or not
    s = np.concatenate((a1xy_/200, finger/200, dist1 + dist2, [1. if self.on_goal else 0.]))
    return s, r, done
We still have one more loose end when it comes to the arm environment, we need to update what's displayed on screen and we can do this by adding an additional function to our Viewer class. The update_arm function works in the following way
- Calculate joint positions
- Calculate new joint positions after movement
- Given the new joint positions use trigonometry to move each vertex of each rectangle the appropriate amount
- Redraw the rectangles
def _update_arm(self):
    (a1l, a2l) = self.arm_info['l']
    (a1r, a2r) = self.arm_info['r']

    #calculate joint positions
    a1xy = self.center_coord
    a1xy_ = np.array([np.cos(a1r), np.sin(a1r)]) * a1l + a1xy
    a2xy_ = np.array([np.cos(a1r+a2r), np.sin(a1r+a2r)]) * a2l + a1xy_

    #figure out by how much joints need to be rotated
    a1tr  = np.pi / 2 - self.arm_info['r'][0]
    a2tr = np.pi / 2 - self.arm_info['r'].sum()

    #Rotate 4 vertices of the first arm rectangle
    xy01 = a1xy + np.array([-np.cos(a1tr), np.sin(a1tr)]) * self.thickness
    xy02 = a1xy + np.array([np.cos(a1tr), -np.sin(a1tr)]) * self.thickness
    xy11 = a1xy_ + np.array([np.cos(a1tr), -np.sin(a1tr)]) * self.thickness
    xy12 = a1xy_ + np.array([-np.cos(a1tr), np.sin(a1tr)]) * self.thickness

    #Rotate the 4 vertices of the second arm rectangle
    xy11_ = a1xy_ + np.array([np.cos(a2tr), -np.sin(a2tr)]) * self.thickness
    xy12_ = a1xy_ + np.array([-np.cos(a2tr), np.sin(a2tr)]) * self.thickness
    xy21 = a2xy_ + np.array([-np.cos(a2tr), np.sin(a2tr)]) * self.thickness
    xy22 = a2xy_ + np.array([np.cos(a2tr), -np.sin(a2tr)]) * self.thickness
    self.arm1.vertices = np.concatenate((xy01, xy02, xy11, xy12))
    self.arm2.vertices = np.concatenate((xy11_, xy12_, xy21, xy22))
Alright let’s try moving the arm around randomly and see if it works.

See why shouldn’t try this on a real robot arm first?
Putting everything together
Given the 3 components we built above we're now finally ready to see the fruits of our labor. Remember we have:
- The DDPG algorithm which is a reinforcement learning algorithm that outputs continuous values
- An Arm environment that keeps track of its state and can render itself using Pyglet
- A training and evaluation pipeline
As far as I know it's not possible to run Pyglet inside of a Jupyter notebook, so you can train the arm using the Floydhub CLI for best results and then view your results on your local machine. We've tested the arm on Mac OS X.
Training
$ pip install pyglet
$ floyd login
$ floyd init robot-arm
$ floyd run "python main.py"
Results
Finally let’s take our saved model and test it out. Notice how it found 2 different solutions!
In main.py, change ON_TRAIN to FALSE and then run
python main.py
Feel free to play around with the above and see it working for yourself on different locations of the goal red dot. All you need to do is go env.py and change the x and y values of the goal variable to anything between 0 and 400.
goal = {'x': 100., 'y': 100., 'thickness': 10}
Just for fun let’s give the robot arm a task it can’t possibly accomplish and put the goal at the lower left corner so that it can’t reach it.

The arm still learns something reasonable! Pointing in direction of the goal which shows us that our reward function is robust to these situations.
The above is obviously a simplified view of robotics but has all the components you need to understand to build the most complicated robot in software you can dream up. Here is where you can go from here.
Next steps
- Make a squid arm in 2D: our algorithm generalizes to as many joints as we like. It may take longer to train but it’s doable. The primary changes from this codebase would be to add more arms and angles in the Viewer and update arm functions. You’ll need to make sure to pass in the larger state to the DDPG algorithm
- Create a 3D arm: the real world is 3D and a 3D robot in software is an obvious next step. We’ll be covering how to do this in the next tutorial
- Build the arm in real life: 10 years ago, it wasn’t feasible to build a robot at home because the hardware was just too expensive. Fast forward a few years and you have things like Arduinos which can be hooked up to a Raspberry Pi to our DDPG algorithm in Python without changing a line of code. What a time to be alive!
I’ll be back soon with a post on training 3D robots using reinforcement learning.
About Mark
Mark Saroufim is the founder of Yuri.ai, a game AI company, and the author of an upcoming book on a Reinforcement Learning approach to Game AI. Mark is also a FloydHub AI Writer.
You can follow along with Mark on Github or his personal blog: www.marksaroufim.com. You can also sign up for Yuri.